
Building the iMac Fish Tank
As mentioned in my last blog post, I just finished a long-running project…

The tank I always wanted…
This project took a lot of time to complete, but that was mostly because I did a lot of thinking and researching and testing – imperfectly, I might add – in an attempt to preserve the look of my one-of-a-kind shell. And because I had kids and various other distractions in the course of the project. If you’re the sort of person who can focus on one thing at a time and put steady effort in, you could do the same project in a week or two.
Step One: Acquire an iMac
The method of this step is all on you – and it’ll be a lot harder today than it was for me. They are still out there, but the people that have them are not likely to let go of them if they know what you’re doing with it. They’re likely to be rather attached.
That said, there’s absolutely nothing about this project that demands an iMac. You could do the exact same project with just about anything. I recommend the following criteria in selecting your subject:
- Visually, rectangular or rectangular-ish shapes with one clear “window” area will work best
- Think TVs, monitors, window boxes, jewelry or music boxes, display cabinets, etc.
- Plastic (ABS or acrylic) is easiest to modify
- Internal volume should be simple – little or no essential internal structure
- The top should either come off easily or have a means of opening, for feeding and cleaning
- Large tank volumes (>10 gallons) will be difficult to fabricate easily, probably requiring professional construction techniques and costs
- Small tank volumes (<2 gallons) are more difficult to maintain as a fish tank
Step Two: Empty The Shell
You want as much clear volume as possible inside without modifying the overall look. Start with disassembling it, removing the interior pieces that clearly are not visible from the outside. When you get close to the shell, start being selective. Each piece removed from the interior makes your tank bigger, simpler, and easier – but also may change the look of the finished piece.
Once you’ve got a shell and essential interior parts it’s time to get more aggressive.
Start by taking the individual pieces of the interior you’ve decided to keep, and reduce them to the essential bits. Kept an iconic power button? Slice off the front and glue it in place, get rid of the switch. You don’t care about function – just appearance.
For the case, your first goal is to get rid of as much of the internal support structure and stiffening as possible. You don’t need to reuse the internal support structure – while it might be possible, tank supports are easy to fabricate and it’s not worth the trouble. And while stiffening the case might be useful, the factory design and purposes are totally different from yours. Loads and pressures will be completely different, so just cut away anything that might be in your way.
The outer casing is a special situation. When it was made, the casing was designed to come apart – once in a while, for assembly and maintenance. As a fish tank, you need to open at least part of it daily for feeding, and less frequently for cleaning. You probably, for aesthetic reasons, want to use the existing seams and joins but remove things like screw studs and snaps.
This is tricky. With plastic shells, like the iMac, you want to keep some alignment tabs but remove the parts that lock together. You want smooth seams and joins, but nothing that has to be messed with to get them. You also need to consider the number of pieces. The iMac has four; a base piece, a front frame around the CRT screen, and inner and outer shell pieces. It snapped and screwed together in a very tight alignment.
The finished fish tank has two pieces. I glued the entire upper shell together and to the front frame, then removed all the screw connection points and most of the alignment tabs controlling the connection to the base piece. This part took a long time, figuring out how to get the configuration that gave me the right look with the ability to easily open it up – and it isn’t anything like what I thought it would be at the start.
It’s also where I made my biggest mistake. The acrylic cement I used was compatible with the plastics of the casing, of that I was certain – but it melted and distorted the plastic. Made for perfect, extremely strong bonds, which I wanted, but it’s visible. Very visible. And every time I look at it I remember the frustration I felt and the need for testing compatibility in person and somewhere invisible.
Which leads us to Lesson One of Projects.
At some point in every project – usually in the middle, nowhere near the start or the finish – it will probably look and feel like a failure.
If you stop there, it will be.
Step Three: Mocking Up the Tank
Fish tanks are not terribly complicated – they can’t be. You’ll fabricate it from 3/16″ or 1/4″ sheet acrylic, using a plastic cement to bond it together, and you want long, straight, clean seams – as few of them as possible. Without special equipment curves are difficult and possible in only one axis, so choose carefully and avoid them if possible.
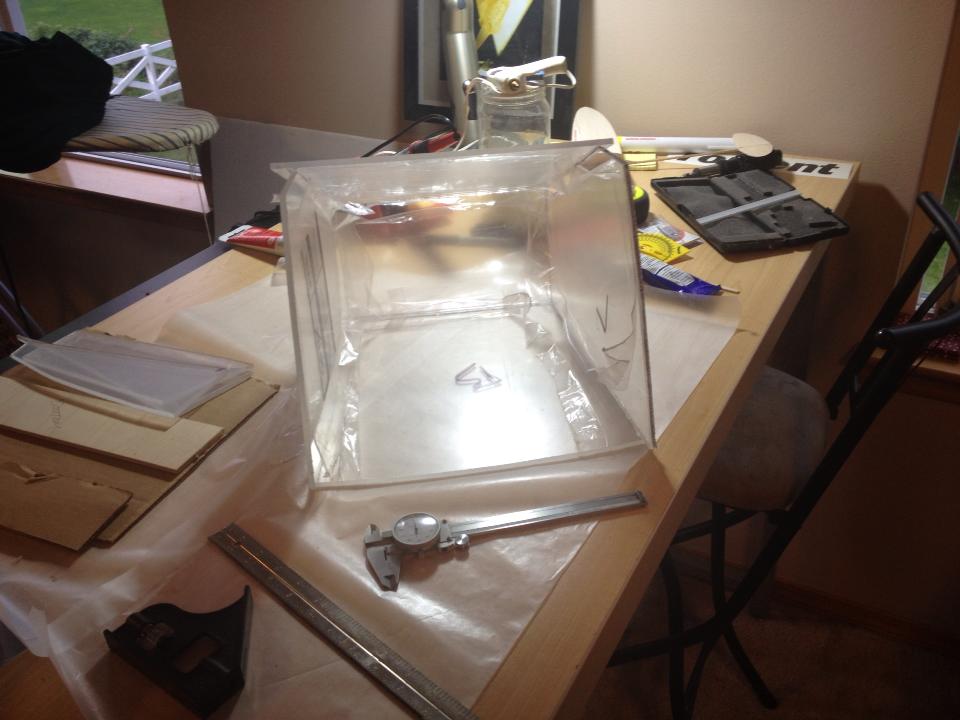
Start by making a mock-up out of something cheaper and easier to work. Cardboard or model foam board are the best choices – cheap, easy to cut and tape, yet stiff enough to hold a solid shape.
Start with the bottom.
The bottom of your tank should be flat, more or less level, and if possible the biggest part of your tank. Aim for it to be half an inch to an inch below the edge of your “window” into the tank, and build up from there. Keep cutting and fitting until you get it right – this is to the time to experiment, not later.
After the bottom, build the sides and back, then move on to the top.
In the case of something like the iMac, the original screen is curved in two dimensions. Ignore that and, if you must have a curve, go top-to-bottom. Finish with the front edge of the top behind the front of the base. Visually, hide the front seams with the frame of your object – the edges will likely not be pretty.
Your final water level will be an inch or so below the top of your tank, so keep that in mind. You will also need to be able to reach into your tank for maintenance, so try not to make the top too narrow – I cut it too close trying to work in as much volume as possible into that narrow top, and ended up having to widen it on the finished tank.
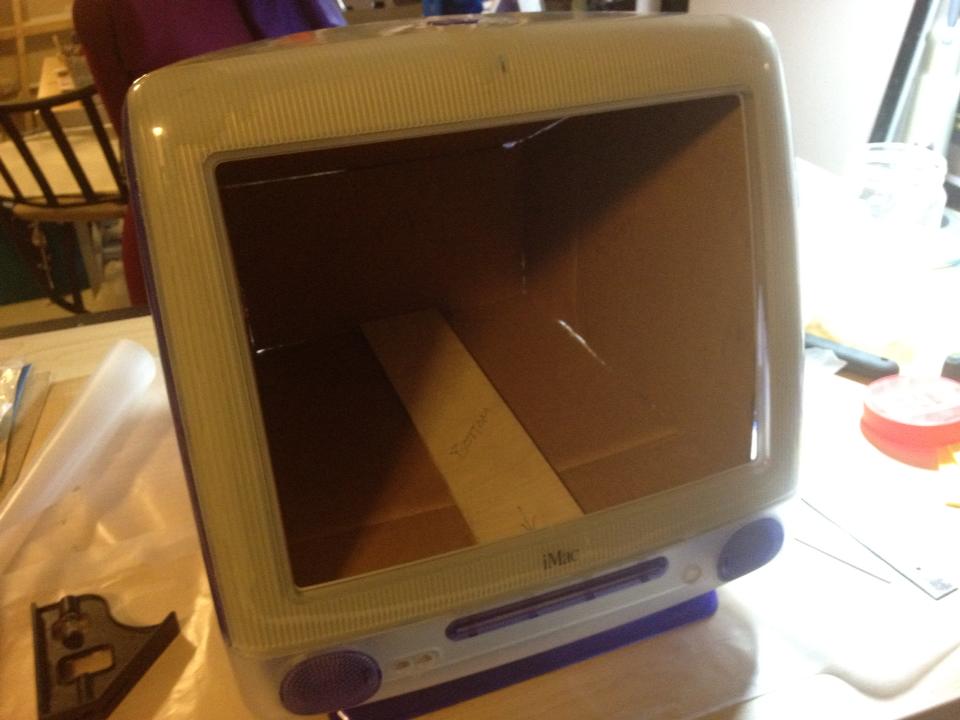
My finished mock-up
Can you see what I did wrong? I didn’t either.
Here’s the mistake – I cut my cardboard pieces and fit them together with tape, edge to edge. When I cut my plastic using these pieces as templates, I needed to use butt joints, edge to surface. My final tank is almost this shape, but not quite, and it was far enough off that the case didn’t fit.
Now, setting that aside, when you have a finished mock-up assemble your tank around it. Does it look right? Not just fit. Sit and stare at it. Does it look like the picture you imagined? This is the time to fix it if it doesn’t.
When you’re happy, and you’ve got all your pieces together, it’s time to start cutting out the plastic.
Step Four: Tank Fabrication
You can buy sheet acrylic at any big-box home improvement store. Get a nice big sheet, more than you think you need – it’s nice to have a margin for error, and you’re going to need to fabricate supports and things from the scrap. You also want acrylic cement, it comes in a metal foil squeeze tube covered in warnings about exposure. You’ll need the following tools:
- A Sharpie (not a dry-erase marker – it smears)
- Ruler or straightedge
- Masking tape
- A saw – a band or table saw preferably, but even a hand saw will do the job
- A power sander
- Scrap wood, clamps, squares, etc.
- Gloves
Start by laying out your pattern pieces on the plastic. Make your cuts as easy as possible while limiting material waste. Trace the patterns with the Sharpie, then start cutting. It’s often easier to cut your pieces out quickly with a wide margin, then do a series of clean-up cuts to match your lines.
Clean, straight edges and solid angles are essential to a sturdy tank, you need surface area for the cement to create a bond. Sand your edges and make sure your pieces are finished and squared off before getting out the cement. The plastic will be covered with a film – peel that back a little before gluing, as the cement will melt it and fog to your acrylic. Make one seam at a time and use your scraps, clamps, etc. to lock your pieces in place until they’re fully set.
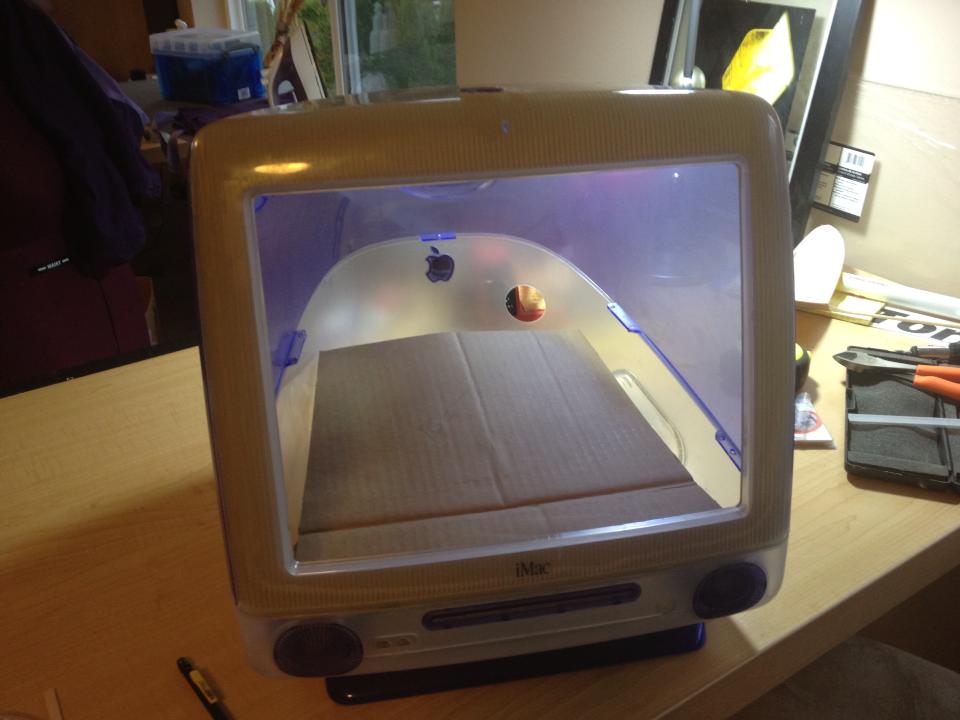
Assembling the tank
Here, I’m working with the top to get it aligned and in position before gluing. I found it easier to make my pieces bigger than I needed, then trimmed them close with a flush-cut pull saw, but others prefer to cut the final shape and use it to align their work for gluing. Don’t remove any more of that film than necessary – it’s what keeps your plastic clear and smooth for the finished product.
Now, about that curved front. I left a lip on the bottom piece at the front and glued the front piece to that lip. Once it was fully set, I ran cement up each side and used a series of tension clamps to bend the plastic against the cement.
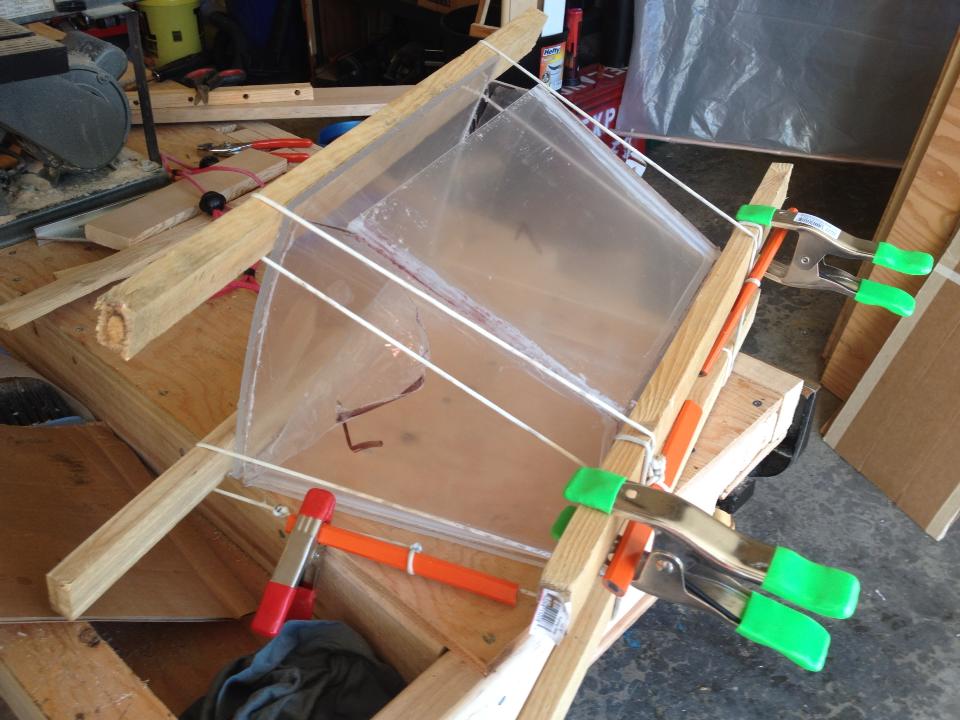
I knew those pencils would come in handy.
I used the pencils like you would in a tourniquet, which allowed me to apply just enough pressure to hold the piece firmly into the sides. It took a few tries to get everything just right, but once I did, it worked beautifully.
Once all the pieces were in and the cement was fully cured – a process that took several days – I ran a bead of silicone sealant on the inside of every seam and sanded the excess plastic off the outside edges. Then it was time for the first real test – I filled the tank with water. It leaked like a sieve.
This is a process. The simplest fix is “more sealant”, and it’s made for the job. Use it, use a lot of it. I found it helpful to make a tool, a cloth pad over the end of a sharpie and a latex glove finger taped over that, to smooth the seams down in the bottom edges and corners of the tank. Eventually, I filled the tank with water for a week and didn’t lost a drop – but it took several tries to get that far.
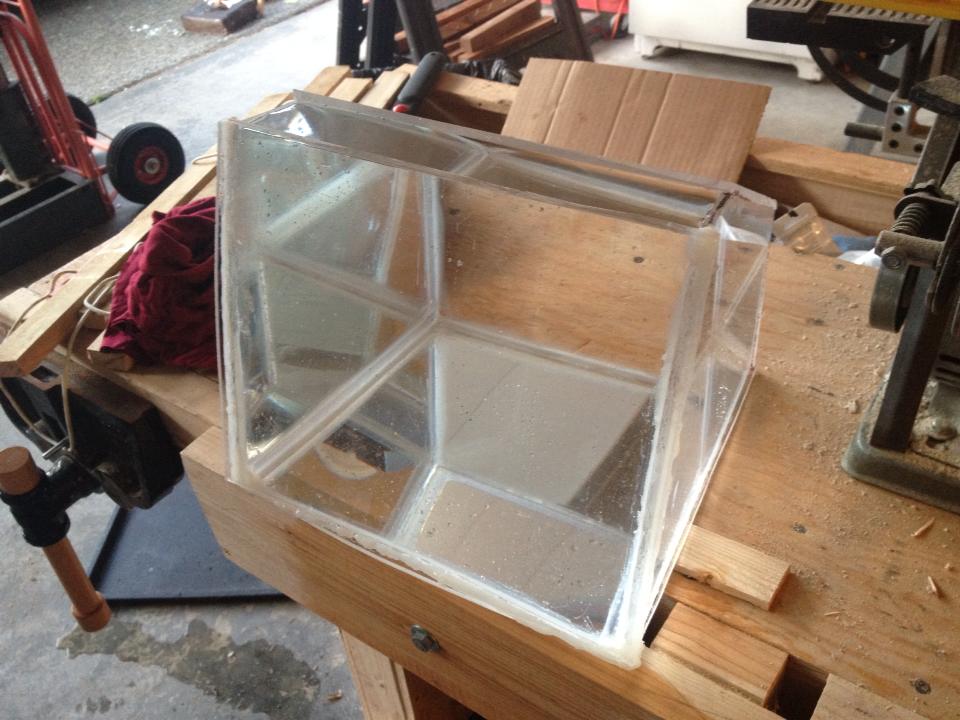
This wasn’t that final test – I just thought it was
Step Five: Final Assembly
You have a finished, watertight tank, and a finished, beautiful case. Time to put them together.
First, test-fit to make sure your finished tank fits inside the case as planned. Mine didn’t. It took some nail-biting, thinking, sanding, swearing, and cutting to make it work, and it’s still tighter than I originally planned. No matter what, it can be fixed – if needs be, by cutting the tank apart and gluing it together again, smaller.
You may want to check that part before the leak testing.
Once you have the fit you want, you need to support the tank – it’ll be a lot heavier full of water. I not only cemented the feet of the iMac for stability (they flip up and down for… reasons, I’m sure) but also added two different vertical supports to the bottom of case directly under the tank. One across the front, the other at ninety degrees to the first, roughly in the middle.
The first secret is to spread the load out as much as possible, make your supporting edges as long as possible in the available space. Second, do not cement in these supports.
You may need to remove the tank from the case some day – to make it bigger, to do some repairs, whatever.
Instead, once you have the placement worked out and your parts cut, use hot glue or something similar to lock them into place. Hot glue is strong and flexible, which is good for the support structure, but more importantly if you need to you can break the bond without risking the plastic of your case. Then cement the supports to the bottom of the tank for a strong hold.
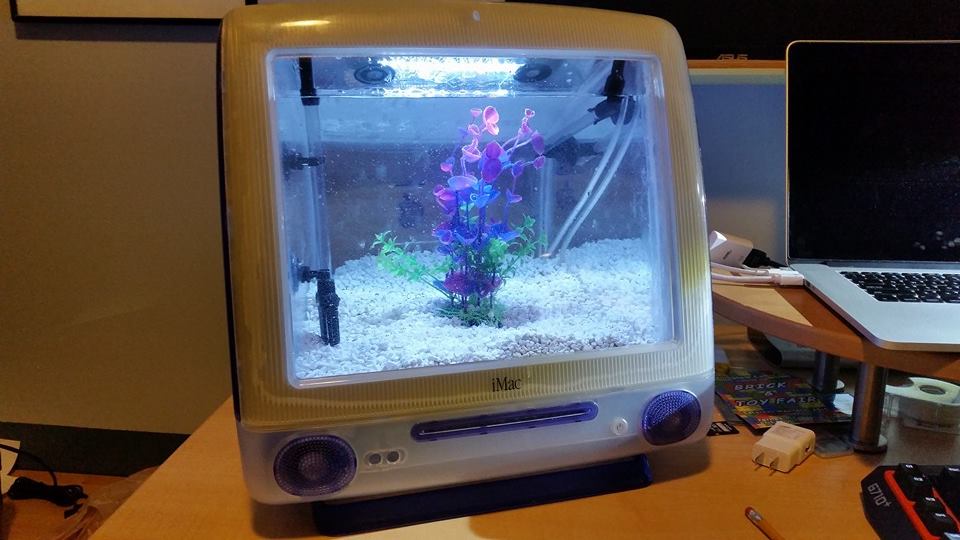
Once done, add your aquarium equipment (filters, heaters, airline, etc.) and fill it with water. That’s it – you have a fish tank.
Ready for occupancy.