
Our No-Touch Media Setup
As promised…
First, the background and hardware. The home network is pretty complicated, but the important components for this are:
- The NASNAS stands for Network Attached Storage. It’s a standalone box of hard drives, with over 8 TB of total storage for all the various things. It gets used for computer backups and so on, but media files make up most of the data on the system. Ours is an older Netgear ReadyNAS NV+, and should be replaced sometime in the next year – it’s beginning to show its age rather badly.All content is stored on the NAS in the /media folder tree.
- The Media ServerI bought an older Dell desktop off eBay; it’s got a reasonably fast processor, a Blu-Ray Disc reader, 4 GB of memory, gigabit ethernet, and a fast 200+ GB hard drive. The video card is nothing special. The whole thing was about $100; the most expensive / difficult part to source was the Blu-Ray disc reader, that ended up increasing the price significantly.
- The FlexGet BoxThis could be on the Media Server, but in our case it’s not. I’m using a Raspberry Pi Model B running Raspbian; the purpose of this system, aside from various housekeeping network chores, is to run FlexGet.
Section One: FlexGet
First, I set up the FlexGet box to download media for network television shows. I’m not going to go into a lot of detail here since there are complete and excellent instructions at the main FlexGet site. Installing it is fairly straightforward, configuring it is a little more complicated – there are so many things it can do, getting it to do the specific things you want can be a little intimidating. Play with it, test it out, play some more, and you should be able to get it.
In order to make this work with the rest of the system, there is one critical step. Shows are downloaded to a temporary directory, and then after they’ve been successfully downloaded they’re moved and renamed into the media folder tree like this:
/media/TV Shows/$series_name/Season ##/$series_name – S##E## – $episode_title.mkv
So, the most recent episode of, say, The Blacklist ends up as
/media/TV Shows/The Blacklist/Season 03/The Blacklist – S03E11 – Mr. Gregory Devry.mkv
It does this automatically based on show information from TVDB, which means it occasionally gets things wrong and I have to manually fix it – but it’s not a big deal. This format is critical for later steps.
Note: I use FlexGet to download BitTorrent episodes of TV shows only where I have access to the content through legal, licensed means (specifically, our cable subscription.) It can be used to download anything at all, including content that infringes on someone’s copyright. That’s not what I’m doing, and if you choose to do so, don’t come crying to me if you run into trouble.
Section Two: Plex
Plex is the software used to organize and play back content. It runs on the Media Server, serves content from the NAS, and can be accessed from anywhere – inside or outside our network.
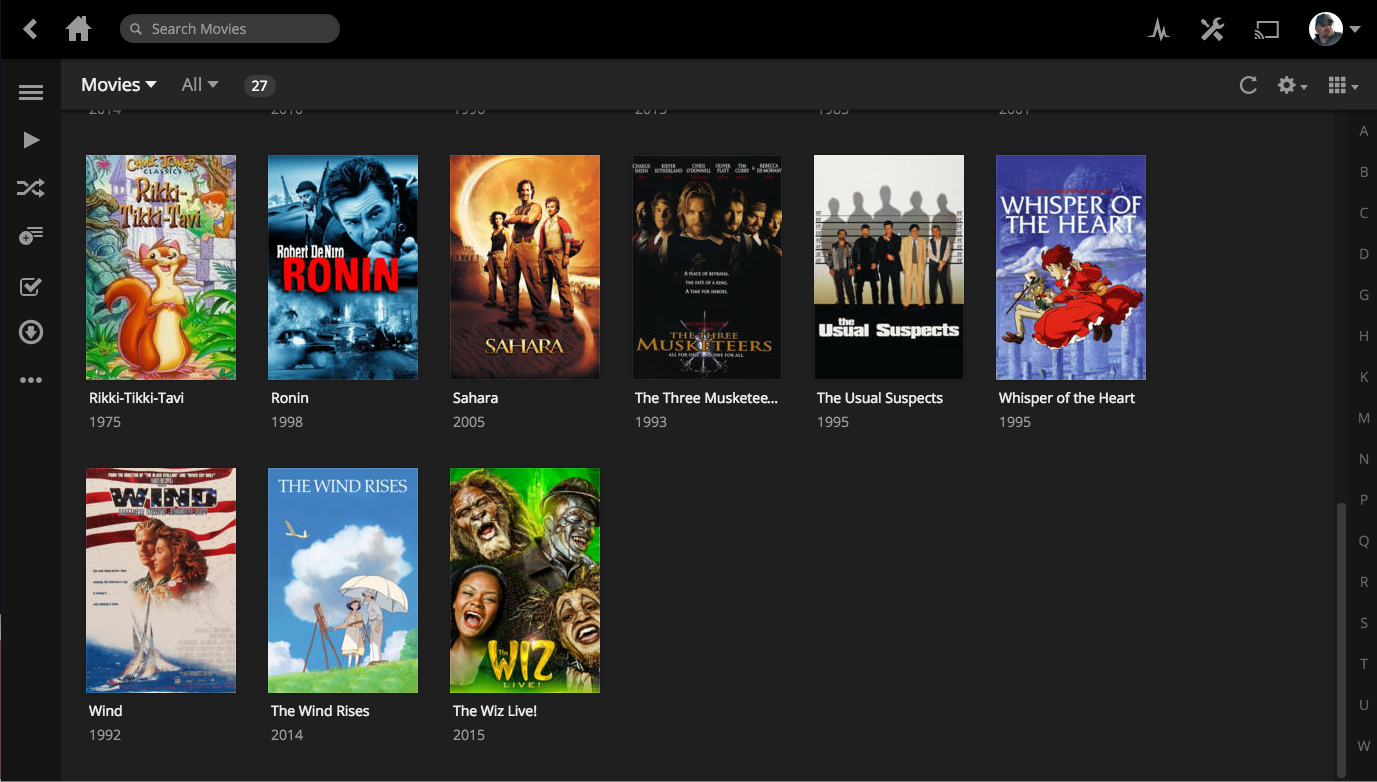
Don’t judge. You have movies you’re not proud of too. And besides, that’s not mine.
The Plex installation process is pretty straightforward, and I didn’t run into any trouble following the standard instructions (I’m running the media server on Ubuntu 14.04, which is the version the Linux instructions were based on.) Note that one of the advantages of Plex, aside from being able to access your library from a very wide variety of devices, is that you can connect with other Plex users and share libraries. I only recommend that for close friends and family for various reasons – starting with your Internet connection has a limit to the number of streams it can support – but it’s a very nice way to share your content with the people you’d normally happily loan DVDs.
Section 3: No-Touch Ripping DVDs and Blu-Ray
Okay, so here’s the part that took the work and fiddling. Like most people, we have an extensive library of DVDs and Blu-Ray movies acquired over the years – some we never watch anymore, a lot of kids movies, etc. They’re bulky and take up space in the living room and the kids are pretty hard on them, so moving them to the NAS and making them available through Plex is a really good idea. But it takes a while to rip a disc, and babysitting that is not my idea of a good day. So I automated it.
I used HandBrakeCLI and MakeMKV for this process, mostly because I was already familiar with them. There are alternatives that would do the job just as well. The whole thing fits together with some bash scripts and a careful configuration of Ubuntu on the Media Server.
Step 1: Ubuntu Configuration
Go into the System Settings, and set up the following options:
User Accounts: set a user account to log in automatically
Security & Privacy: disable all Password requirements
Brightness & Lock: Disable locking, uncheck “Require my password when waking from suspend”, and turn off “Dim screen to save power”.
Two points – one, this is obviously a very bad idea to configure a computer this way, if it contains any sensitive information or has access to other, more sensitive computers.
Two, this is critical to the no-touch part of the system, but it means the system never powers down to conserve energy. If it’s sitting headless under a desk as a server, that’s not a big deal – even older workstations like this use very, very little power when sitting idle.
The user account should still have a password set, and it’s a good idea for it to be a complex one. This system is at least technically accessible from the Internet through Plex – preferably only on a single port, but still.
Step 2: Utilities and Packages
We need to install DVDBackupm, MakeMKV, and HandBrake. The simplest method of doing so is to add the repositories and prerequisites and let Ubuntu keep them up to date. From the command line:
$> sudo add-apt-repository -y ppa:stebbins/handbrake-snapshots
$> echo 'deb http://download.videolan.org/pub/debian/stable/ /' | sudo sh -c 'cat >> /etc/apt/sources.list'
$> echo 'deb-src http://download.videolan.org/pub/debian/stable/ /' | sudo sh -c 'cat >> /etc/apt/sources.list'
$> wget -O - http://download.videolan.org/pub/debian/videolan-apt.asc|sudo apt-key add -
Then update your sources and install the necessary packages.
$> sudo apt-get -q update
$> sudo apt-get -y install dvdbackup git handbrake-cli handbrake-gtk libdvdcss2 build-essential pkg-config libc6-dev libssl-dev libexpat1-dev libavcodec-dev libgl1-mesa-dev libqt4-dev libfdk-aac-dev
To install MakeMKV requires manual compilation. I followed the instructions from the makemkv forum, but here’s the simplified version:
Install updated ffmpeg for library support – download from the ffmpeg home page.
$> ./configure --prefix=/tmp/ffmpeg --enable-static --disable-shared --enable-pic --disable-yasm --enable-libfdk-aac
make install
Then compile and install both the makemkv-oss package:
$> PKG_CONFIG_PATH=/tmp/ffmpeg/lib/pkgconfig ./configure
$> make
$> sudo make install
And finally the makemkv-bin package:
$> make
$> sudo make install
Last, delete the temporary ffmpeg files to clean up:
$> rm -rf /tmp/ffmpeg
That’s all the technical pieces – now let’s put it together.
Step 3: The Ripping Scripts
Set these up first, then we’ll automate them. I use noti and PushBullet to send notifications to my phone – if you don’t want to do that, remove the noti commands from the scripts (preserve the echo commands from those lines to keep a log).
The scripts are pretty straightforward – copy the disk to the local hard drive on the media server, convert the main title to an mkv file, and move them to a location on the NAS under the /media/Movies tree according to the disc title. Disc titles are not the best way to do this – many of them are nonsensical, especially older DVDs – but I haven’t gotten around to figuring out how to look up the real title information yet. It’s possible, just haven’t done it.
Both scripts are based on versions I found online, but required some significant tweaking to get them to work the way I wanted. I don’t recall the original source – if I find it again, I’ll add a link. You’ll need to change the environment variables at the start of the script for your configuration.
/usr/bin/ripbluray
#!/bin/bash
WORK_DIR="/tmp/"
OUTPUT_DIR="/mnt/media/Movies/"
SOURCE_DRIVE="/dev/sr0"
HANDBRAKE_PRESET="AppleTV 2"
EXTENSION="mkv"
LOG_DIR="/mnt/media/tempfiles/Movies/Logs/"
LOG="movies.txt"
function rip_bluray() {# Use the disc title BLURAY_TITLE=$(blkid -o value -s LABEL $SOURCE_DRIVE) # Replace spaces with underscores BLURAY_TITLE=${BLURAY_TITLE// /_}# Backup the DVD to hard drive makemkvcon backup disc:0 $WORK_DIR$BLURAY_TITLE --decrypt eject $SOURCE_DRIVE# grep for the HandBrakeCLI process and get the PID HANDBRAKE_PID=`ps aux|grep H\[a\]ndBrakeCLI` set -- $HANDBRAKE_PID HANDBRAKE_PID=$2# Wait until any existing Handbrake job is done if [ -n "$HANDBRAKE_PID" ] then while [ -e /proc/$HANDBRAKE_PID ]; do sleep 1; done fi# Encode mkdir $OUTPUT_DIR/$BLURAY_TITLE HandBrakeCLI -i $WORK_DIR$BLURAY_TITLE -o $OUTPUT_DIR$BLURAY_TITLE/$BLURAY_TITLE.$EXTENSION --preset=$HANDBRAKE_PRESET -s "1,2,3,4,5,6" > $LOG_DIR/$BLURAY_TITLE-HANDBRAKE.log rm -R $WORK_DIR$BLURAY_TITLE# Write to log & send PushBullet notification so Mr. Thumbs can change the disc noti -p -t "Finished ripping $BLURAY_TITLE" echo $BLURAY_TITLE >> $LOG_DIR/$LOG }rip_bluray
/usr/bin/ripdvd
#!/bin/bash
WORK_DIR="/tmp"
OUTPUT_DIR="/mnt/media/Movies"
SOURCE_DRIVE="/dev/sr0"
HANDBRAKE_PRESET="Normal"
EXTENSION="mkv"
LOG_DIR="/mnt/media/tempfiles/Movies/Logs"
LOG="movies.txt"
function rip_dvd() { # Use the disc title DVD_TITLE=$(blkid -o value -s LABEL $SOURCE_DRIVE) # Replace spaces with underscores DVD_TITLE=${DVD_TITLE// /_}# Backup the DVD to hard drive dvdbackup -i $SOURCE_DRIVE -o $WORK_DIR -M -n $DVD_TITLE > $LOG_DIR/$DVD_TITLE-DVDBACKUP.log # pop out the disc eject $SOURCE_DRIVE # grep for the HandBrakeCLI process and get the PID HANDBRAKE_PID=`ps aux|grep H\[a\]ndBrakeCLI` set -- $HANDBRAKE_PID HANDBRAKE_PID=$2# Wait until any existing Handbrake job is done if [ -n "$HANDBRAKE_PID" ] then while [ -e /proc/$HANDBRAKE_PID ]; do sleep 1; done fi# Encode mkdir $OUTPUT_DIR/$DVD_TITLE HandBrakeCLI -i $WORK_DIR/$DVD_TITLE --main-feature -o $OUTPUT_DIR/$DVD_TITLE/$DVD_TITLE.$EXTENSION --preset=$HANDBRAKE_PRESET -s "1,2,3,4,5,6" > $LOG_DIR/$DVD_TITLE-HANDBRAKE.log rm -R $WORK_DIR/$DVD_TITLE # Write to log & send PushBullet notification so Mr. Thumbs can change the disc noti -p -t "Finished ripping $DVD_TITLE" echo $DVD_TITLE >> $LOG_DIR/$LOG}rip_dvd
Step 4: Making it Work Automatically
We’re going to take advantage of Ubuntu’s autoplay capabilities to make this work.
First, we need new MIME types defined:
/usr/share/applications/ripbluray.desktop
[Desktop Entry]
Name=Rip Blu-ray
Comment=This will start the automated Blu-ray ripping process
Exec=ripbluray
TryExec=ripbluray
MimeType=x-content/video-bluray
Type=Application
/usr/share/applications/ripdvd.desktop
[Desktop Entry]
Name=Rip Blu-ray
Comment=This will start the automated Blu-ray ripping process
Exec=ripbluray
TryExec=ripbluray
MimeType=x-content/video-bluray
Type=Application
And set them in mimeapps.list…
~/.local/share/applications/mimeapps.list
[Default Applications]
x-content/video-dvd=ripdvd.desktop
x-content/video-bluray=ripbluray.desktop
[Added Associations]
Finally, go to the System Settings on the media server for the user running your scripts. Under Details > Removable Media, set DVD Video to “Rip DVD”. Click Other Media and set “Blu-ray video disc” to “Rip Blu-Ray”.
That’s it. Put a disc in the drive, and the system will start the appropriate ripping script. Plex will automatically grab metadata for it. You’ll occasionally need to change filenames (especially when the disc title is DVD_VIDEO… SMH) or change a mismatch in Plex, but neither of those are big jobs.
Section Four: To-Do List
The disc title method is not ideal. It’s possible to grab the real movie title a couple of ways, but I haven’t put in the time to research that just yet.
Currently, it’s not entirely reliably grabbing the actual movie – it trusts the disc not to screw with it, which isn’t a reasonable thing to do with the various stupid copy-protection schemes in use. I have some thoughts about fixing this and making it better, mostly around grabbing the longest video file instead of the one labeled as the main content, but, again, haven’t gotten around to it.
freakhomz
How about the ripping of AUdio CD’s to FLAC?